Tuesday, January 29, 2013

Lemon Blueberry Buttermilk Muffins + doTerra Lemon Oil Giveaway

A blog friend of mine, Joelle, recently sent me some amazing essential oil samples. She was kind enough to share my favorites: lemon, lavender and peppermint. Plus, it's amazing how much knowledge she can share when it comes to how these oils treat and deal with so many everyday issues and symptoms. I just love soothing a health issue with a plant based oil rather than a drug, chemical or even something you have to swallow. She was also generous to offer one of you a bottle of some amazing lemon essential oil... so see the end of post for details in winning a bottle of your own...

I have used the lemon essential oil for baking, and I also made a nice cleaning spray to use as an air freshener and also cleans the surface as well. I used a 8 ounce spray bottle with 4-10 drops of lemon oil and viola you have a very simple fresh smelling cleaning spray. It is seriously SO uplifting and fabulous in the home!  I have also done something similar with lavender oil to help with freshening my rugs or home after dusting or cleaning. The doTerra oils are very potent, so you really only need a few drops. Learn more about them here. So a bottle will last forever, but also it is perfect for this pregnant momma who has a hard time with toxic cleaning smells and it also keeps me and my baby healthy. What are some of your favorite essential oils and how do you prefer to use them?
I also love how you can cook and bake with many of these essential oils. The lemon flavor in these muffins are just wonderful-with full scent and flavor of a fresh lemon tree. Which has been perfectly satisfying to me, because I have had an intense lemon craving lately, like all the time! I just can't get enough of the fresh and sunshiny flavor. Especially in the dead of winter when you are looking for bright and beautiful distractions from the grey and cold outside. The smell is also energy boosting and brings immunity with it when it is digested.

Tangent...
I saw this recipe post today and will be making these Lemony Bars from Green Kitchen Stories very soon... sorry, tangent... it's my pregnancy brain. And, it's easily distracted by beautiful pictures of yummy and healthy food that involve lemons.

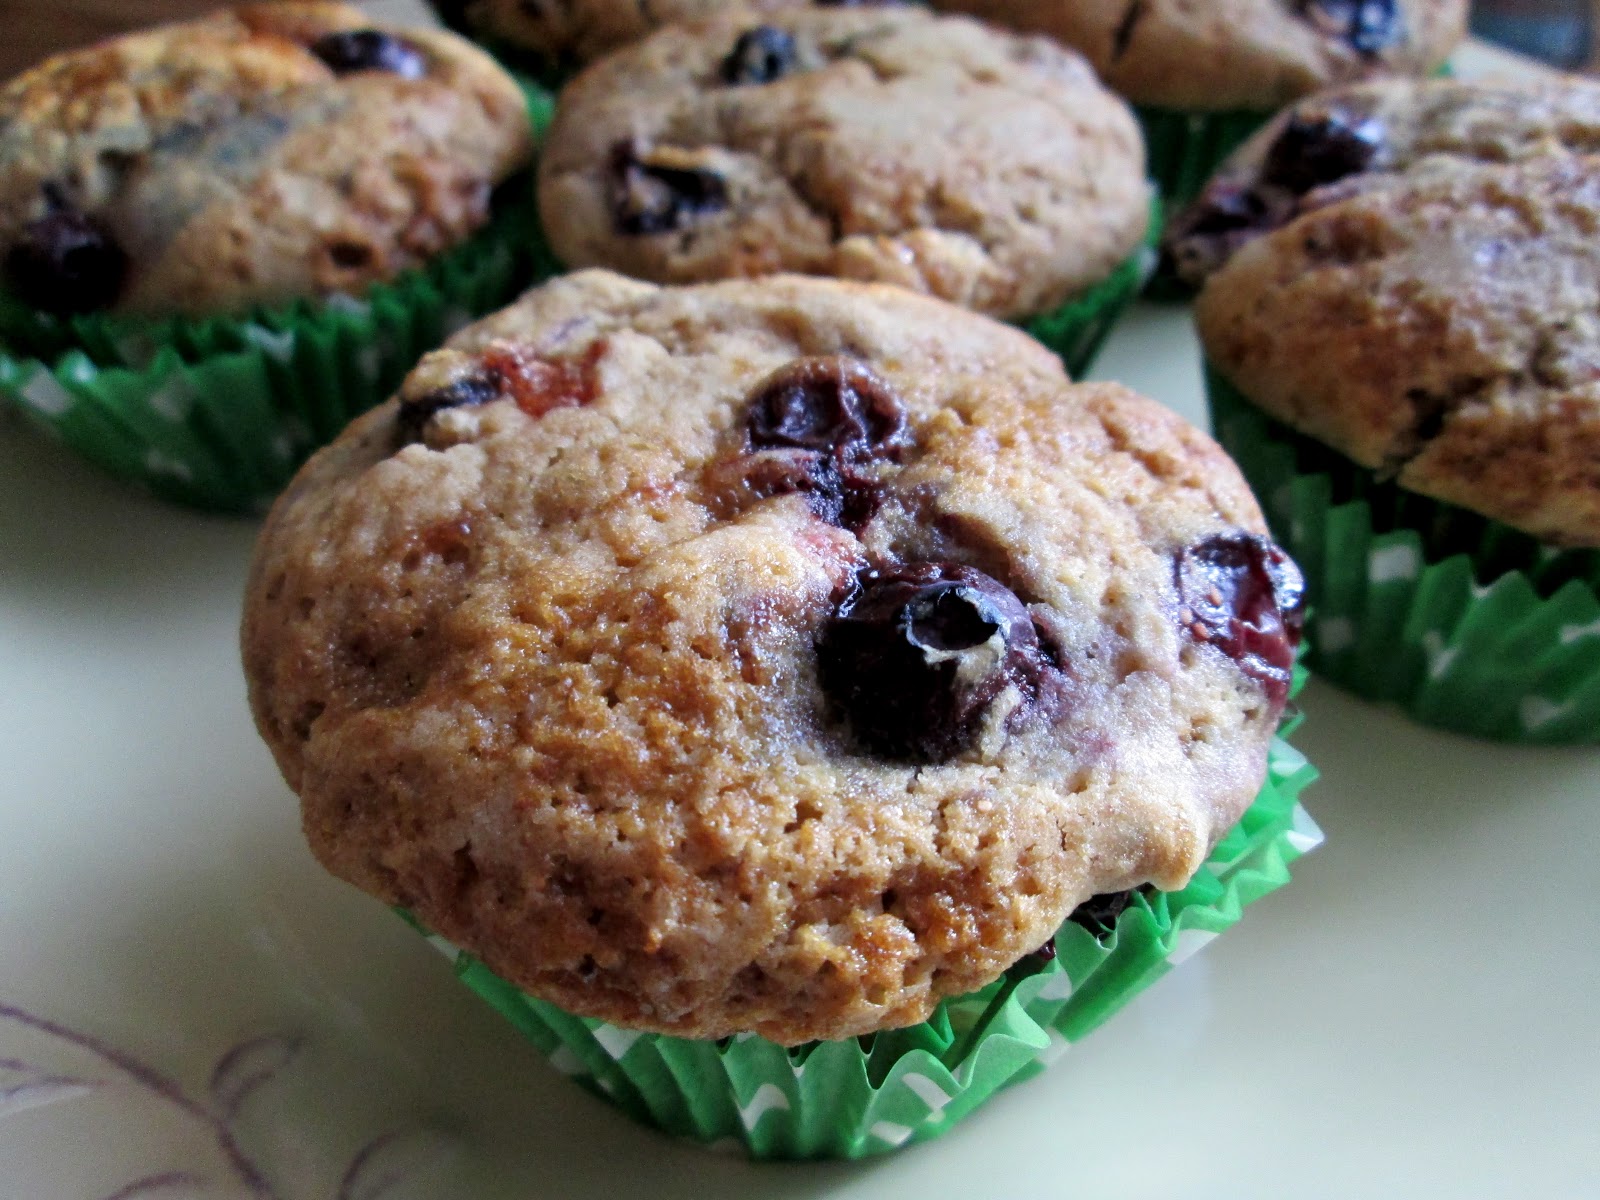
Now, back to my own kitchen... I made these not too sweet muffins with one of my favorite combos of lemon and blueberries. I also experimented and made this recipe as a coffeecake instead of muffins in a  9 or 10 inch square or circle pan and you have to bake in double time, but it turns out fabulous as well. Especially still warm with a drizzle of vegan butter and honey.
 Lemon Blueberry Buttermilk Muffin Recipe 
{gluten, dairy, nut-free, vegan option}
1/2 cup of brown rice flour
1/2 cup of millet flour
1/2 cup of tapioca flour
1/2 cup of fresh ground buckwheat or certified GF oat flour
1/4 cup of coconut flour
1 1/2 ts. of baking powder
1/2 ts. of baking soda
1/2 ts. of sea salt
2/3 cup of coconut sugar + more for sprinkling on top
1/3 cup of honey
1/3 cup of melted coconut oil, or light olive oil
1 fresh egg or chia-egg replacement (1 TB chia meal to 3 TB of water wisked)
2/3 cup of coconut milk beverage (I used So Delicious)
   plus juice of 1 lemon (2 TB of juice) and can add some zest from lemon for more flavor
   plus 4 drops of lemon essential oil (I used doTerra)
   plus 1 ts. of pure vanilla

1 heaping cup of fresh or frozen blueberries (I used frozen this time)

In a large mixing bowl, blend your mix of GF flour and for best results use a fresh ground buckwheat flour that you grind from buckwheat groats in a high powered blender. Blend all of the dry and then add the rest of the wet ingredients and the "buttermilk-lemon milk" blend last after you let it sit by itself for a few minutes to curdle. Mix the batter well and then lastly add the blueberries and just fold them in so that you don't allow them to bleed too much into the rest of the batter. Use a 1/3 cup to measure out each muffin batter into a muffin tin or cup. This recipe will make 12 medium to large muffins. Sprinkle the tops of the muffins with some coconut sugar or fresh lemon zest before baking. Bake in a preheated 350 degree oven for 22-25 minutes depending on your oven and elevation. 

Pull from oven, test the middles with a toothpick and then let cool for at lest 15 minutes before moving to cooling rack or eating. 

Serve with a drizzle of honey or maple syrup. And, ENJOY!
OK, so how can you win a fabulous bottle of doTerra lemon oil of your own....?

Here are the details to follow:
1. Leave a comment below on this blog post and tell me your favorite essential oil and why.
2. Become a follower of Joelle's blog, under the RSS feed, and then leave another comment here
3. Become a follower of Joelle's facebook page, and then leave another comment here.
4. Check out Joelle's website to learn more about doTerra's oil and what they have to offer, then leave another comment here.

So you have 4 chances to win, and the winner will be chosen by random out of the full order of comments below and will be chosen on Monday February 4th at 1pm EST. I will announce the winner on the blog and then will ask the winner to email me to get your full name and info to get your reward.

Hope you are staying warm, finding some sunshine and Vitamin D, and good luck with the giveaway!

Much love,
Stephanie

Tuesday, January 15, 2013

Oatmeal Chia Bread

About this time every year, I start dreaming and trying to make lovely loaves of bread to eat with comforting bowls of soup. Or just to have around as a lunch or snack topped with sunflower seed butter and homemade pear butter or whatever fruit and nut you like. It's funny because when I looked back the past 3 years I have posted some form of "protein" bread in January, so I guess my instinct for bread making in January cannot be denied. This bread is no different. It is full of whole grain goodness and protein along with a hefty helping of chia seed meal to make it full of fiber, antioxidants and even more protein.
There is something about making your own bread as a gluten-free lady that makes you feel like you conquered some law of science that said it can't be done. It isn't easy, but it can be done and this one is also done without yeast, eggs, dairy and any kind of gummy addition, which is also a challenge these days. Regardless if you have failed before in the GF bread baking dept. I challenge you to try again and try and make it interesting and not always compare it to the bread from Italy, France or gourmet local bakery. Because we all know that you just can't completely compare, you are using different flours and how could you come up with the same exact result, right?! The goal is to find a bread that makes you feel like you are not settling, one that you really can say you love and that the best part is it is gluten-free.
I do have some days where I just want to stroll along the brickroad street and pick up a hearty loaf of goodness from the local baker. Especially after living over seas in the Middle East and seeing parts of Europe it seems a special simple novelty that should happen on a daily basis. I haven't found a local gluten-free bakery yet here in Grand Rapids that offers that same feel, and have only experienced once or twice in other cities while traveling. So instead of mopping and crying about it, why don't you try and make a loaf yourself. It does take some patience, and possibly some skill, but when you complete it the result is something of a feeling of accomplishment that you can only sense ever so often. Like building something from nothing or finishing a race worth running.
It is worth it. But don't take my word for it, try it out and see what happens. I bet it may not be perfect or what you intended, but just trying it will help you see that it is possible and you may find yourself trying again to perfect a recipe or try new recipes as well. I made this loaf last week to get through another gloomy day here in Michigan. Where is the snow people?! At least  if the grey was covered in white I think I could feel more romantic about winter.
In the meantime, I will be coping with some fresh homemade bread a pot of homemade soup and possible a book late into the evening. I think it is the only way to really feel the rest that winter intends for us. I hope you are finding new hopes this 2013!

Oatmeal Chia Bread Recipe
[gluten-free, vegan, nut-free and yeast and gum free]

2/3 cup of freshly ground buckwheat flour
1/2 cup of organic millet flour
1/2 cup of tapioca flour
1/2 cup of organic brown rice flour
1/2 cup of chia seed meal
1/4 cup of coconut sugar
1 1/2 ts. of baking powder
1/2 ts. of baking soda
1/2 ts. of sea salt
1/3 cup of olive or grapeseed oil
1/4 cup of blackstrap molasses

In a large mixing bowl, blend all of the gluten-free flours together with a whisk and then with the rest of the dry ingredients. You can add the oil and molasses in a pool in the middle of the dry. Then pour in the following mixture after it has sat for 5 minutes.

Separate wet ingredients:
1 cup of gluten-free rolled oats
2/3 cup of coconut milk beverage (I used So Delicious. Or sub other dairy-free milk)
1-2 TB of lemon juice
1 1/4 cup of boiling water

In a small glass bowl, pour the boiling water over the dry oats and then add the milk and lemon as well. Let it sit for 5 minutes or so to get soft and have the milk and lemon culture just a bit. Then add it to the above mixture of ingredients. Mix well and then let the batter sit for 5-10 minutes for the flours and chia to soak up the moisture and become more thick. Then grease a bread pan with coconut oil and a gluten-free flour. Pour the batter into the bread pan and smooth over like a quick bread and then top with some more flour, gluten-free oats or seed of choice.

Bake in a preheated 350 degree oven for 45-50 minutes until the bread crust is hard on top and the middle of the bread is NOT gooey to the toothpick test.

Pull from oven and let cool for 15-20 minutes before sliding from pan and continuing to let cool on a bread or cookie cooling rack. When mostly cool, then you can use a bread knife and slice thin or thick slicing depending on your preference. This bread stays well for 3 days and is great toasted the next day in a toaster oven to warm up and spread some of your favorite toast goodness on top.

Enjoy!

Much love to you and may you find rest and peace today!

Monday, January 7, 2013

Mocha Yogurt Cheesecake

Hello 2013- You sure opened the door to the new year with a bang! First, this delicious cheesecake and second, the flu hitting our house starting with my little 2 year old son. I made this last week to celebrate the new year and then...I kinda forgot about it. Life goes on pause while you nurse the sickness and try to get back to normal again (I will have to write another post about some of the cold/flu remedies we survived with another time).

But really, just the lack of sleep alone knocks you out for a few days. The good news is that this cheesecake still tasted good after being found again a few days later. And some would say that cheesecakes only gets better the more chilled it stays. I had to quick snap a photo and share before it was all finished up. Perfectly chilled, slightly honey sweetened and rich and delectable with each bite!
Like I said in my last post, this baby likes it's desserts. And because I have been occasionally eating some organic dairy while pregnant I had some plain yogurt to use up as well. This idea came to me when I thought about how plain organic yogurt, strained, makes a really great yogurt-cheese. Add some leftover coffee and chocolate from the holidays and a magical cheesecake comes into play. This was a new experiment for me, and I am very happy with how it turned out and will be trying this again in the future for sure.
You could easily make this recipe grain-free by omitting the GF oat flour in the crust and subbing it for almond or another favorite nut-flour. Not coconut flour though, it would be to fibrous, but if you like almond flour or meal that would be a great sub there. I was surprised at how the yogurt and eggs really do the trick to make this cake creamy and thick and rich. You won't even miss the traditionally cheesecake made with lots of cream cheese. This is a great healthy cheesecake alternative that I am not ashamed to eat or share.

Mocha Yogurt Cheesecake Recipe
{gluten-free, grain-free option}

Crust:
1 cup of freshly ground gluten-free oat flour
1 cup of unsweetened shredded coconut
1/3 cup of raw cocoa powder
dash-1/4 ts. of sea salt
1/2 cup of soft organic coconut oil
2-3 TB of local honey or maple syrup
2-3 TB of strongly brewed leftover coffee

First grind some gluten-free rolled oats in a high powered blender to make your own flour. And then mix all of the above ingredients in mixing bowl together well with a spatula or your hands. Then sprinkle into a 10 inch spring form pan, or a 9x13 Pyrex glass pan and press down firmly, and evenly with a spoon or your hands. Bake in a preheated 350 degree oven for 12-15 minutes. Let cool down for at least 15 minutes and then pour the cheesecake on top and continue to bake.

Cheesecake Filling
1 quart organic plain yogurt- strained to equal about 2 cups after whey is removed
6 farm fresh eggs
1 TB of pure vanilla
2-3 TB of strongly brewed leftover coffee
1 cup (4 ounces) of melted chocolate chips or bar pieces
1/2 cup of local honey

First, even before making the crust, you need to pour a quart-sized container of organic plain yogurt (I used Stonyfield Organic Low Fat Yogurt) into a strainer that is covered with cheesecloth (or even a paper towel works too) that has a bowl underneath. Stick back in the fridge for 2-4 hours and let it reduce by half and pour out the whey collecting in the bowl underneath the strainer. Then use the "yogurt cheese" in the cheesecake filling mix.

Mix the yogurt cheese and eggs together then add the rest of the ingredients. You can melt the chocolate over a double-boiler or in 30 second intervals in the microwave. Pour in the melted chocolate last and then whisk well for a minute by hand and then pour over the already baked crust. Bake in the preheated 350 degree oven for 55-60 minutes until the middle of the cake is firm and not liquid. 

Let cool on the counter for an hour and then put in the fridge with a plastic wrap or fitted cover top. Chill for 8-24 hours before serving and then sprinkle with decaffeinated ground coffee beans, grated chocolate or fresh fruit of choice. A simple berry compote could be made as well for topping and serving if you desire. Or if you have a favorite chocolate sauce or glaze for serving that would just put it over the edge!

I hope you enjoy this one or save it in your back pocket for a special occasion.

Until then, much love to you!

Tuesday, January 1, 2013

Sunbutter Banana Chocolate Chip Blondies

Happy New Year! 2013! 
Can you believe it?!
I fell asleep last night right after 10:30pm, I tried to stay awake, I really did, but when you are growing another human being in your body you tend to get tired pretty fast. So, needless to say I woke up after the midnight hour to go to the bathroom. Wonderful way to ring in the new year :) right?!
But then for a split second, I thought about sneaking another bite of these scrumptious treats. I didn't know what to call them at first because they have a little bit of everything wonderful. They are kinda like cake, but then kinda like brownies, so I am sticking with blondies just to be different. If you are a peanut butter and banana fan, then you have to try this combo. Of course I subbed in the sunbutter to make them nut-free, but some creamy peanut butter would also work wonderfully. Or maybe you are a peanut butter and chocolate fan? These will hit the spot too! A little bit of wonderful in every bite. Minus refined sugar of course.
I have been craving chocolate and sweets with this pregnancy more than with my first....does this mean  it's possibly a girl? I dunno, but something (or somebody) has hyjacked my sweet tooth and made it sassy and tenacious. Of course I don't know if you could call my refined-sugar-free sweet tooth, really a sweet tooth, but still...it's sweet to me, and calories no difference.
That is one thing this new year's that has been interesting. I am not going to start any "new resolution" in my diet or try any crazy raw smoothie thing for the new year. I am pregnant, and that's my job right now, but I am sticking to that resolve if you want to call it that. I do want to try and drink more water, drink nutritous teas and eat more greens. But don't we all. And, the nice part is that I can even find great joy in making and eating a special treat like this one....even after the holidays :)
But, don't like me change your mind about trying new and exciting adventures in the kitchen this new year. Maybe you want to try a vegan diet, or maybe you want to eliminate something you know has been giving you troubles (dairy, eggs, nuts or whatever). I give you my full and honest support in whatever ventures you find yourself in. My only thing is that you have to do it for you. Don't go on a skinny diet because you think that is what the people around you want to see from you. Don't start working on that six-pack because you think that will bring you to some new level of enlightenment. Just do what fits for you. And, stick with it, for you. Care for yourself and make that a resolution. Think about it as starting a new habit instead of accomplishing a goal. Think about it being a part of the person you are becoming on a journey instead of some fad thing you want to try out.

Well, that's my soap box speech for the day. Take it or leave it. Or call it crazy pregnancy hormones. At least that's my excuse for these amazingly satisfying treats. I hope you have a happy new year and many blessings in 2013!
Sunbutter Banana Chocolate Chip Blondie Recipe
1/4 cup of applesauce (I used homemade)
1/4 cup of local honey
1/4 cup of coconut sugar
1/4 cup of melted organic coconut oil
1 cup of mashed ripe bananas (I used 3 medium)
1 fresh egg (or chia or flax egg replacement- 1 TB ground seeds with 3 TB water whisked)
1 TB of pure vanilla
1/3 cup of sweet sorghum flour
1/3 cup of millet flour
1/3 cup of tapioca flour
1/2 ts. of baking powder
1/2 ts. of baking soda
1/2 ts. of sea salt
1/2 cup of sunflower seed butter*
1/3-1/2 cup of chocolate chips (dark, dairy free is what I prefer)

Ingredient Notes:
*If you want to make this a grain-free recipe, you can sub all of the flours for 1 cup of almond or other nut flour.

*I used sunflower seed butter because I wanted to avoid nuts, but you can sub the sunbutter for your favorite nut butter. I think peanut or almond butter would also be delicious. 
In a large mixing bowl, add the sweeteners, oil and egg. Whisk well together and then add the flours and dry ingredients. Lastly mix in the sunbutter thoroughly, then add half the chocolate chips to the batter. Use coconut oil to grease a 8x8 pyrex pan and then pour the batter into the pan, spread even and then sprinkle the remaining chips. Bake in a preheated 350 degree oven for 30 minutes and make sure to check with a toothpick to make sure the middle is cooked and not gooey. Let them sit for at least 10-15 minutes before cutting into. This recipe will make 16 bars in a 8x8 pan.

Then, ENJOY!

Much love as always!